Wire Wave Bracelet
Wave Bracelet
Karen Meador, PhD
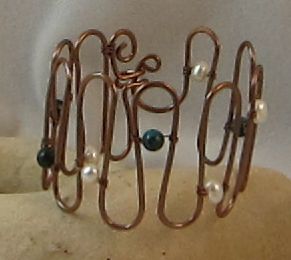 There are many variations to this bracelet and it can easily be modified to make it your own. The tutorial below shows the bracelet in its simplest form.
Materials
14 Gauge Wire (shown in copper) – Minimum 42 Inches for a 7” wrist
24 Gauge Wire (for binding embellishments) – Approximately 36 Inches
Beads for Embellishment (number varies according to your design)
Patina (if desired, Liver of Sulphur patina shown)
Tools
Flush cutters
Round Nose Pliers
Chainnose Pliers
Bail Making Pliers or Other Cylindrical Object (based upon size wave being made)
Hammer and Bench Block/Anvil
Optional: Tumbler
Procedures
1. Measure and cut at least 42 inches of the 14 gauge wire. The length will vary based upon the height of the wave, the width of the wave and the circumference of the bracelet. (Are you making this bracelet for Skinny Minnie or Hearty Helga?).
2. Begin the first wave in the center of the length of wire cut in step 1. Use the bail making pliers, a pencil, a dowel or whatever object provides the width wave you want.
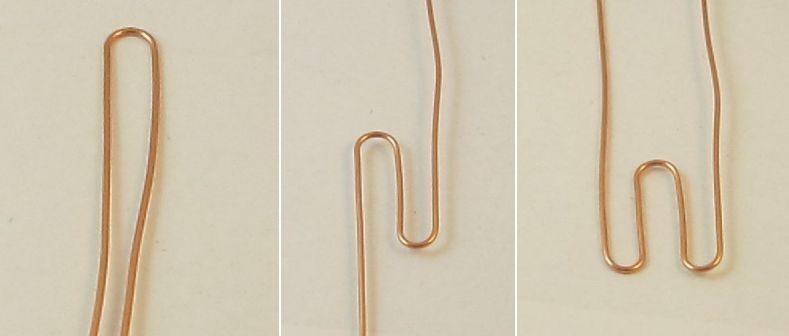
3. Determine the desired height of the wave and create a wave in the opposite direction on one side of the first wave. This produces the height of the bracelet; make this decision wisely.
4. Move to the other side of the first wave and create another wave in the opposite direction just like the one in step 3.
5. Continue in this manner moving from one side to the other until you have enough waves to create the circumference of the bracelet that you want.
6. Make the swirl end of the clasp. Measure 2 ¾ inches from the top of the last wave and flush cut the wire.
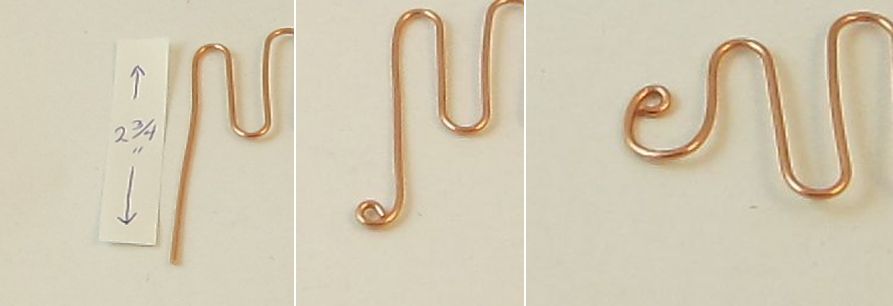
7. Use the round nose pliers to create a tiny loop in the end of this wire.
8. Gently form the rest of the swirl using a cylindrical object, such as the bail makers, to form the shape. This becomes a pirate’s hook NOT a closed swirl.
9. Make the hook end of the clasp. Measure 5 inches from the top of the last wave and flush cut the wire.
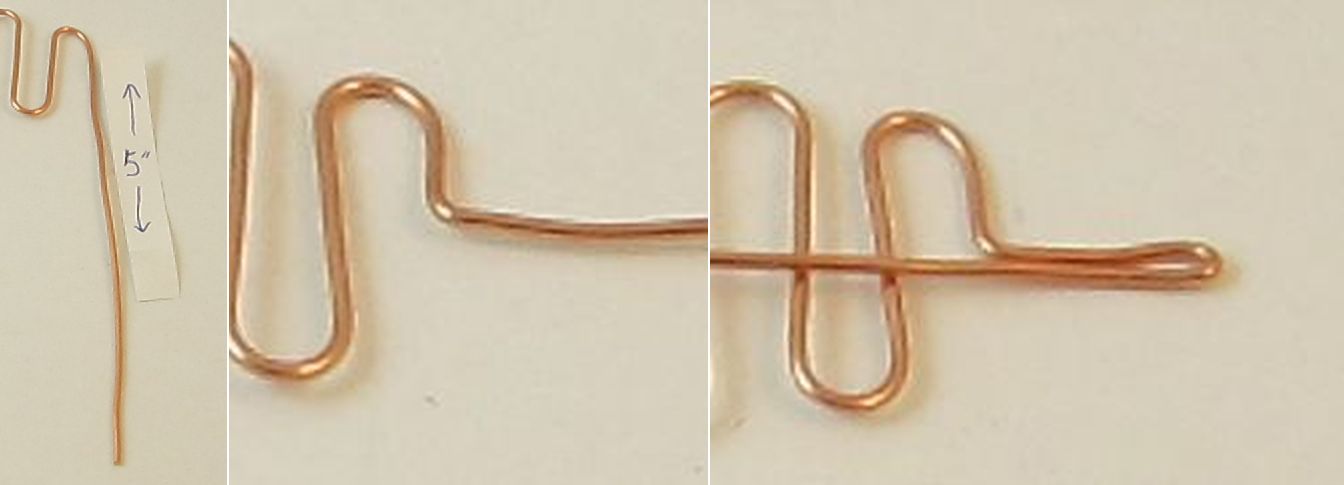
10. Measure ½ the height of the wave ( NOT ½ inch !) and use the chainnose pliers to turn the wire at a right angle to the wave.
11. Measure ¾ inch from this angle and turn the wire back towards the bracelet.
12. Measure ¾ inch from the turn back point and use the chainnose pliers to turn the wire at a right angle away from the hook.
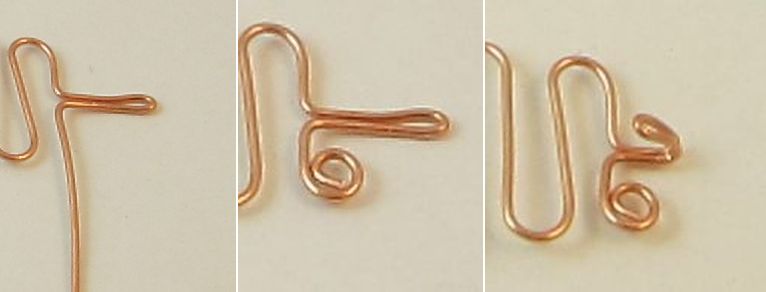
13. Shorten the remaining wire, if any, leaving about 1 ¼ inches.
14. Use the round nose pliers to swirl the remaining wire around until it almost reaches the hook.
15. Create a hook by turning the doubled wire back towards the bracelet.
16. Hammer the bracelet from the inside which will cause it to begin forming a circle.
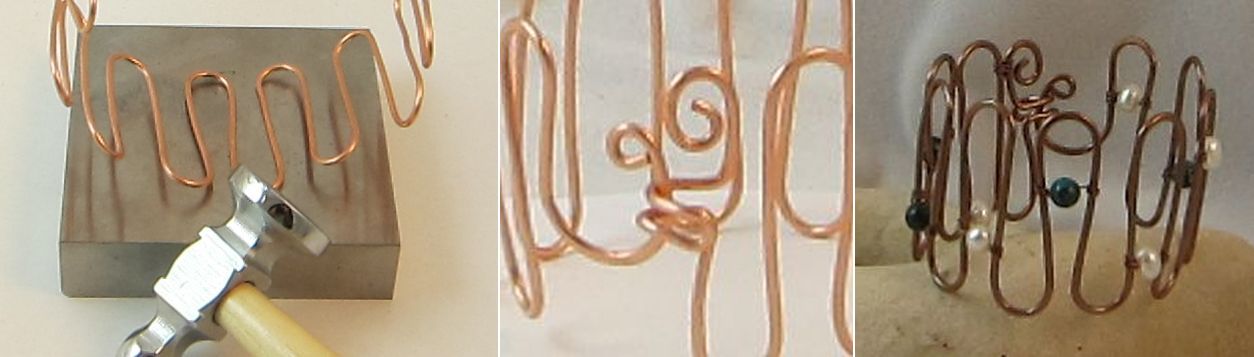
17. Close the bracelet with the clasp making adjustments as needed. Manipulate the pirates hook placing it under and around the other hook end. This is a much easier way that attempting the opposite.
18. Optional: Patina the bracelet now if desired. I usually dip my bracelet and the 24 gauge binding wire in Liver of Sulphur. Then I tumbled them for a couple of hours. If you patina the binding wire at this point it will be the same color as the bracelet wire.
19. Embellished the bracelet with your choice of beads. Plan the placement of these considering the number of waves you have and whether you want beads on every other wave or something else. At a minimum, I try to leave enough waves without embellishment to allow for adjustment of the bracelet size. If you wire across every wave, there is no play in the size of the bracelet.
20. To attach the beads, follow the directions provided in the wrapping and binding tutorial ……….. You will start the binding on one side of a wave, wrapping around at least three times. Then thread a bead or beads onto the wire, taking up the space across the wave, and complete the binding on the other side of the wave. Again, go around at least three times. You will want to make sure the ends of the binding wire sit on the inside of the wave so that they don’t rub the wrist or show on the top. (This is easier said than done.) Also, it is nice to make the same number of binds around the wire for each embellishment.
21. You will want to bind the wave and the swirl next to each clasp side to keep the clasp in the proper position.

22. Have fun!
Karen Meador
**Contributing authors are noted in the articles they wrote. All articles are copyright. You can reprint these articles as long as the original author is sited and a link to this website is included. The name Magpie Gemstones must be used as the hypertext.