Soldering Jewelry 101

Soldering Considerations
Magpie Gemstones often receives questions about how to get started soldering. Although this is not the company’s specialty, it is important to get information to customers regarding interests. This information is not purported to be a recipe for learning to solder, but rather it is written as food for thought.
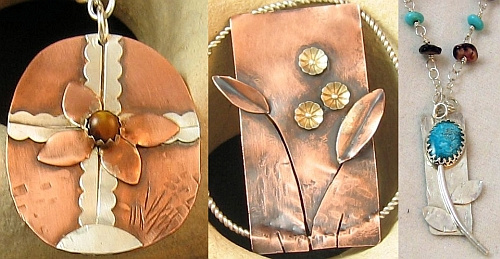
Wilipedia states that “[s}oldering is a process in which two or more metal items are joined together by melting and flowing a filler metal (solder) into the joint, the filler metal having a lower melting point than the workpiece. . . . http://en.wikipedia.org/wiki/Soldering I use soldering in a good deal of my jewelry design work both to join sheet metal and/or wire. I offer you some basic information with this article to initiate your journey into this technique. My purpose is simply to acquaint you with the vocabulary of soldering.
This little trip is guided by a few basic questions
- Why do you want to solder? Have you been limited in your jewelry making and feel this technique would provide opportunities for expanding your designs? Have you already tried cold connections such as riveting and found this wasn’t sufficient for your ideas?Perhaps you don’t really want to join any metals, but just need a torch to anneal your wire (not soldering) so it can be more easily manipulated.
- Are you prepared to make a financial investment in the tools and supplies that are needed for soldering? While there are a few things you can wait to purchase, most of things I will mention are really necessary as you begin learning to solder.
- Can you invest time in learning to solder as well as practicing the technique? I recommend taking classes on soldering or getting a proficient friend to guide you followed by considerable repetition of the skills learned until you become proficient enough to use soldering in your designs.
- Do you have a safe place to solder? Soldering requires the use of an open flame and does create some mess. You will want to wear safety glasses, avoid loose clothing and tie back long hair.
If you have answered the above questions and still want to learn about soldering, the basic vocabulary or language of soldering provided below will be helpful. The following description of soldering may differ somewhat by author, but is roughly the same.
The pieces you want to join together will be placed on some type of fire proof block such as solderite or a charcoal block, sprayed with flux and heated with the torch until ready for the solder. You will place the solder at the join and heat the pieces until it flows. Next you will quench them and then pickle to remove fire scale. Following this, you will need to clean the piece, polish or patina it and put it in the tumbler. If all of that made sense, you do not need to continue reading.
Some of the Vocabulary of Soldering
Torch: 
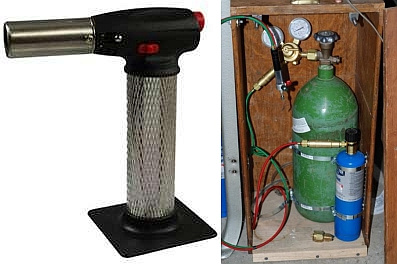
There are many different types and sizes of soldering torches. They range from some that are very small to quite large versions with more than one type of fuel tank. They may be as simple as a little crème’s brulee or plumber’s torch or much more complicated.
Torches may be powered by various fuels such as butane, propane, etc. The size of the torch that you want depends on what you plan to solder. For example, I use considerable copper sheet metal in my work and found that even a medium size butane torch was not sufficient for what I wanted to do.
Copper has a higher melting point than silver and I like to use a propane torch for soldering it. I do like a smaller butane torch for the work I do on sterling silver wire. I know you just wanted me to tell you what you should get, but it doesn’t work that way. What I use and what you need may be entirely different.
 Soldering Blocks
The pieces you are soldering must be placed on a protected fireproof surface. You can purchase something for this or if you have any large floor tiles, you can use those as I do. Some like to use an annealing pan filled with pumice. For soldering, it is necessary to place something like a charcoal block or other soldering board on the fireproof surface. This is where you will place the pieces to be soldered.
Small Tools
These need no explanation, but you will want to gather them before starting to solder. At a minimum, they include tweezers, a soldering pick, safety glasses, a file, scissors and copper tongs for extracting pieces from the pickle. Flux Flux is required in order for soldering to occur. “Flux gives the solder a clean surface from which to connect. A good flux will lessen oxidation and allow the union of the metals to be strong and direct.” http://www.essortment.com/flux-45175.html There are many different brands and kinds of flux and you may get it in liquid or paste form. The type you need will largely depend upon your project. The liquid form usually goes into a spray bottle for application and the paste form can be applied with a brush or other tool. You will definitely know if you forgot to put flux on the pieces because the solder will not flow properly.
Solder
Solder is the filler metal that has a lower melting point than the metals you are joining. I have seen solder in paste, wire and sheet form with the latter being what I use the most. You use scissors to cut the sheet form into small pallions for soldering.
Fire Scale
Fire scale is unwanted and often forms on the surface of the metal during soldering. It can usually be removed by a good soak in the pickle or through careful polishing.
Pickle
Don’t eat this pickle! It is a weak acid used to remove the flux and oxides from what you soldered. Pickle usually comes in granule form which you mix with water. This creates a bath into which you can place your pieces following soldering. Some people put the pickle in a small crock pot and heat it to speed the process. This is not absolutely necessary.
You will want to use copper tongs to place or remove anything from the pickle. Do not put anything steel into the pickle since it will react with the pickle and turn your silver copper colored. http://www.instructables.com/id/How-to-solder-for-Jewelry-purposes/#step1 Please remember that pickle is an acid. You do not want to get it on your skin or clothes. It will eat a hole in fabric as I explained in a blog entry called “The Pickle Ate My Pants” on August 11, 2010 and again in “Pickle Face” on August 26, 2011.
Quench
Use tap water in a plastic or glass bowl as a quench. The soldered piece goes directly from the pickle into the quench so that you can then handle it. If you are simply annealing a piece, take it from the heated surface directly into the quench for cooling. I like to use a glass dish to hold the water since I have previously burned a hole in a plastic one with a large piece of hot metal.
Finishing
Finishing may involve various techniques and I won’t say much about it here except to tell you not to skip this step. You must clean up, patina or polish your soldered pieces to get a nice look. My final step is usually to give the piece a ride in my tumbler.
Good luck if you venture into soldering. I think it’s worth the effort and enjoy the options this technique offers in my designs.
____________________
Dr. Karen Meador
**Contributing authors are noted and linked to in the articles they wrote. All articles are copyright. You can reprint these articles as long as the original author is sited and a link to their site and this website is included. The name Magpie Gemstones must be used as the hypertext.


