


Wire Links and Connectors
Wire links, sometimes called connectors, are an important part of jewelry and have multiple uses. Designers employ them in hand made chains, as connectors between beads, as dangles, as extenders and in a myriad of other ways in jewelry. Wire links not only have multiple uses, they also come in many different configurations. Jewelry makers have a choice regarding whether to use traditional links or to develop unique links of their own.
This tutorial demonstrates the creation of one of those traditional links while offering suggestions for creating those that are more unique. Although many of you reading this don’t need the information that follows, perhaps it will spark an idea that leads to a unique design element. At the least, you may feel more confident about your link work.
Wire Gauge
The wire gauge for links is largely determined by the size and style of the link. Consideration should also be given to the weight of the piece of jewelry for which the link is used. I commonly use 16 gauge dead soft round wire for links and seldom employ anything finer than 18 gauge. In the past, when I’ve used a lighter gauge, I have had to complete repair work later.
Process
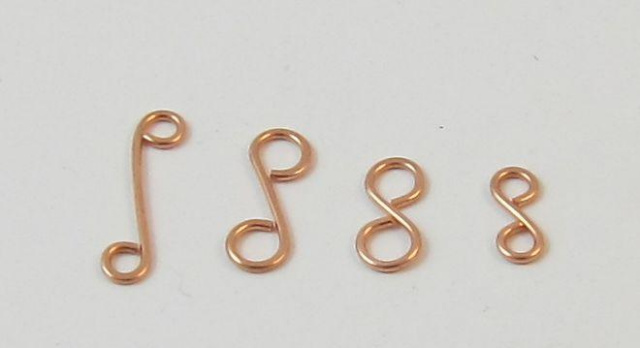
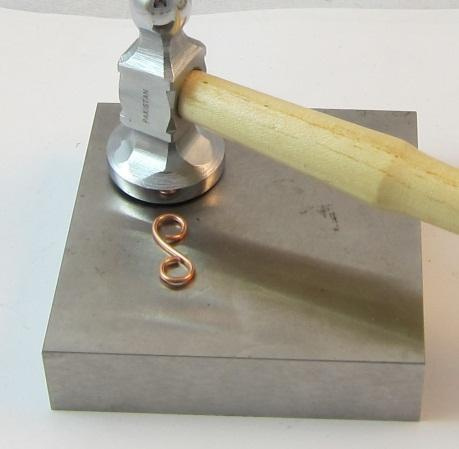
1. Cut two equal lengths of wire. One will be for making the first link and the other will be a pattern for other lengths. Be sure you know how long the link is in order to replicate it for future matching links. The number of inches required for each link obviously depends on the style and size thereof. You will want to work with your own tools to determine exactly how long to cut the wire for your link. For example, you may be wrapping the end of the wire around a medium size bail maker while someone else is using round nose pliers. You may want the ends of the turns on your link to meet in the middle while someone else does not (see top photo).
Szarka of Magpie Gemstones (www.magpiegemstones.com ) and I both use our fingers as a standard measure. I don’t always have a ruler, but I always have my hand. As an example, I can measure and then cut the wire from the end of my thumb to the thumb’s bend and use the larger end of my medium bail makers to complete a link where the wire meets in the middle. This is approximately 1 ½ inches. Other standard measures may be established with different fingers or ending locations. One designer’s standard measure for specific links will vary from the next person’s due to hand size. If you prefer to measure with a ruler, begin with 1 ¼ to 1 ¾ and experiment with the results.
2. Flush cut both ends of the wire. Since I cut several lengths of wire at the start, I then flush cut all the ends. I’m not always sure which end was previously flush cut (especially if I don’t have my glasses on!).
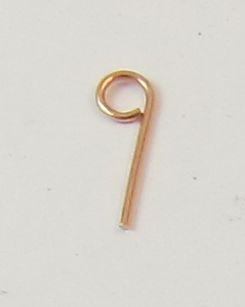
3. Grasp the very end of a wire length and turn the round nose pliers or bail makers around until the end touches the wire. Obviously, the point on the graduated chain nose pliers determines the diameter of the loop. You may want to mark that spot on the pliers in order to make all the loops exactly alike. This isn’t a problem if you are using bail makers.
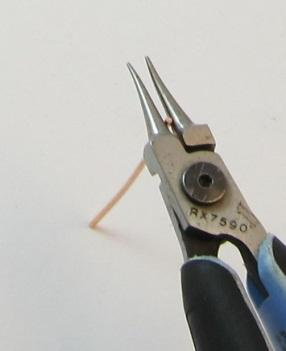
4. Grasp the opposite end of the wire and turn the pliers in the direction opposite the first turn until it touches the wire.
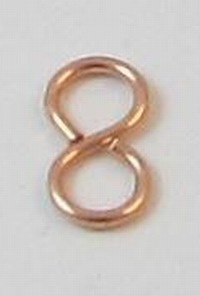
5. Now is the time to make adjustments. Do you like the shape of the link? Would you prefer the ends of the wire were farther apart or closer together? Would you like the rounded portion to have a larger or smaller diameter? Decide on those changes now before creating other links.
6. Hammer the link on a bench block or anvil. This not only flattens it, but also work hardens the link. If you don’t want that hammered look, use a mallet for this step.
7. Check to be sure your loops did not open during hammering. I use my crimp pliers to urge them back together.

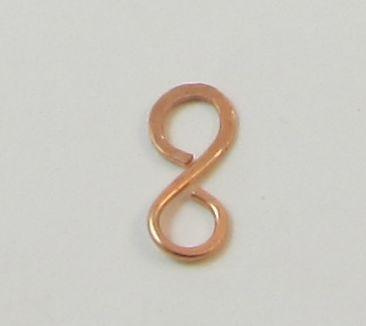
8. Optional: You can give the link a different personality by hammering specific areas to flatten and widen them. I suggest using the rounded side of the hammer for this, followed by the flat side. I hammered only the top loop in the link below so you could view the contrast.
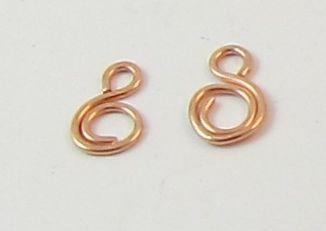
9. When you have completed all your links, you may want to give them a patina. I like to follow this process by tumbling them for at least two hours. I generally hook all the links together before tumbling since this makes them easier to locate in the shot.
NOTE: If you are attaching these links to jump rings, I find it easier to open and close the latter. These links open and close easier than the jump rings and I’m able to do this with one pair of pliers by moving the loop open to the side.
Variations
There are far too many variations of wire links/connectors to show here; yet I would like to make a few cautionary suggestions for creating your own.
Consider whether any part of your link might catch on something and pull apart or snag clothing.
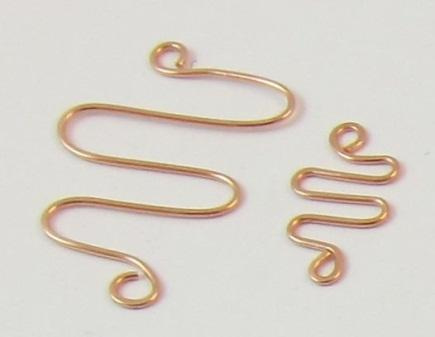
Where does the end of the wire rest against the next link or beading strand? Sometimes the wire end will hamper the proper position of the next link. For example, the end of the left link in the photo below will likely snag the next link incorrectly and deter its alignment. The link on the right ends in a better position.
Is the structure of the link sturdy enough to hold its shape without pulling apart under pressure? The link on the left will not hold up in a piece of jewelry while the link on the right will be adequate.
Does the size and shape of the link complement or distract from the jewelry design?
Good luck making your own links, but beware, creating these little guys can be addictive!
____________________
Dr. Karen Meador
**Contributing authors are noted and linked to in the articles they wrote. All articles are copyright. You can reprint these articles as long as the original author is sited and a link to their site and this website is included. The name Magpie Gemstones must be used as the hypertext.

NEWS!
New beads all the time & great sales!

RESOURCES
Over 100 FREE jewelry making, selling and gemstone tutorials - check it out now!