


Making Headpins
Making Your Own Headpins
Karen Meador, Ph.D.
Why in the world would a person want to make headpins? A year ago I shunned the notion of doing it myself and dutifully ran to the local craft store each time I ran out of pins in the middle of a project. Unfortunately, I wasn’t very good at picking out the right headpin for the bead of the day and sometimes came home with headpins that slid right through the bead hole or pins made of a gauge wire that wouldn’t go in the hole at all. This was not good for my cheery disposition!
Finally, after completing a ring that required balling the end of each wire component with a torch, I realized that making my own headpins might not be too bad. Lest I just lost half of you, let me assure you that this little article is mainly about how to make your own headpins WITHOUT fire! I just got started with the torch first.
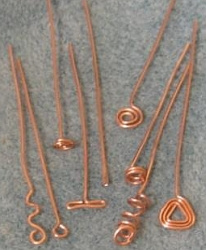
Following are photos showing a myriad of options for making a head on the bottom of a piece of wire. The good news is that YOU get to choose the gauge of the wire that is appropriate for the bead you are using. You also get to select the style head that will complement your design. This sounds like a winner doesn’t it?
Choosing the Right Gauge of Wire
I’m not trying to be a smart aleck here, but just pick a gauge of wire that fits a little snugly through the hole of your bead. For example, fine 28 gauge wire will go through most any bead hole, but certainly is too small for a big hole bead. Use your own judgment. If the wire goes through the hole too easily, try the next heavier gauge. You’ll get the hang of it quickly. I used 20 gauge wire for the headpins photographed herein because I thought it would be easy to see. I more commonly use 22 gauge for my work. You can, of course, use other types of metal wire other than copper.
Straightening and Cutting the Wire
Most wire comes off the coil with a bit of a bend. It is wise to pull the wire through your fingers a few times to straighten it before you cut it. It’s easier to straighten a long piece of wire than a short one. I usually cut from 2 ½ to 4 ½ inches of wire for a headpin. The length depends on the type of end you are making. Several shown herein require more length. Of course it’s better to have too long a piece of wire than not enough.
Creating Simple Wire Headpins
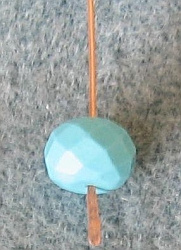
Hammered Headpin
I once ask Szarka, Magpie Gemstones owner, if she made her own headpins. When I told her how I was making mine, she suggested just using a hammer might be simpler. She was right. You can simply flatten the end of a piece of wire by hammering it on a bench block until it is wider than the bead hole. Who knew it could be this easy?
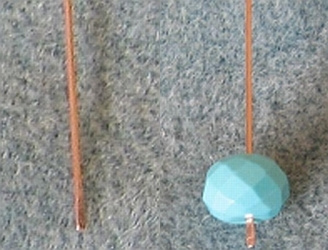
Plan the location of the bead on the head pin and solely hammer the part of the wire you want to show.
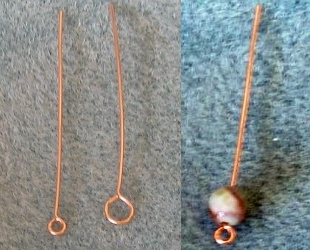
Simple Loop Headpin
You can create another super easy headpin by making a simple loop on one end of the wire. Make this as large or small as you want and note that the loop could be used for attaching something else. There are several videos on YouTube that demonstrate how to make a simple look. I liked the one at the following address: http://www.youtube.com/watch?v=fvR4jdvz_7g . Don’t be confused by this as it is showing how to make a simple loop at the top of a bead after placing it on a store bought headpin. I’m asking you to put this loop at the bottom of the bead in place of that store bought pin.
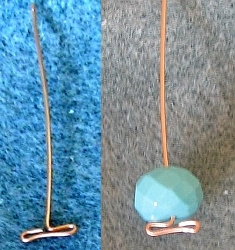
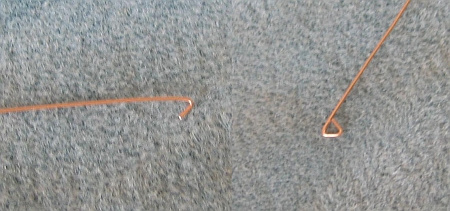
Propeller End Headpin
Create a propeller end headpin by turning it at a 90 degree angle about ¾ inch from the end. Place your flat nose pliers in the angle and wrap the wire end straight back to the center. Work from the other side of the wire and, placing your pliers near the angle again turn the remaining wire back toward the center as shown in the pictures. Clip off any remaining end wire.
Coiled Headpin
Wrap the wire round and round a cylinder to create a coiled end for a headpin. I try to tuck the end of the wire back into the coil so it doesn’t create a rough surface. The photos below show two types of coils that are both made the same way. The coil on the right of each picture happens when you pull and manipulate the coil to make it crazy. Just think of this as if the wire was having a bad day!
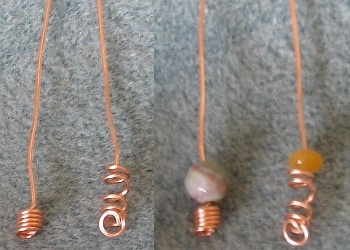
The top of the coil that goes into the bead will be askew unless you adjust it back to the middle of the coil. You can do this by turning two right angles with the wire so that it comes straight up from the center of the coil.
You will remember that I suggested you should straighten the wire before starting to make your headpins. I forgot to take this step when making the coiled headpins shown in the photo. You can see that the wire is a bit crooked. Shame on me!
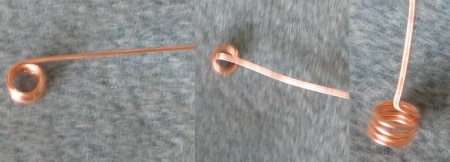
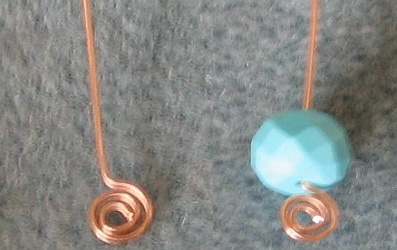
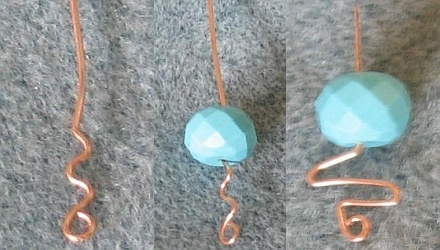
Swirl Headpin
Guess what! The swirl headpin has a swirl on the end! You can tell I’m not too clever with names. Beaducation has a good free video showing how to make spirals. http://www.beaducation.com/vids/watch_class/19 The trick is to end the spiral with a right angle so that the pin part of the wire comes from the middle of the swirl. Otherwise the swirl will look crooked on the bead.
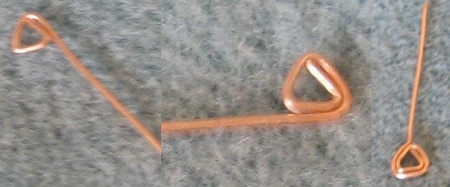
Triangle Headpin
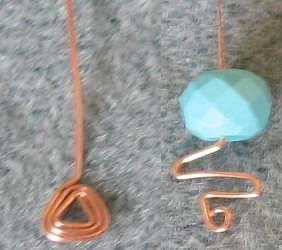
In describing this headpin I could stop by simply saying “make a wrapped triangle on the end of the wire.” That might not be very helpful if you are just starting out with wire work; so I thought I would add a few pictures. I hope they help.
Zig Zag Headpin
This is a “do your own thing” headpin. You can see that it starts with a simple loop and then zig zags. You determine the number of zags and the shape of the zigs.
Torched Headpin
I would be remiss if I didn’t mention that balling the ends of wire with a torch is a very simple way of creating headpins. You simply hold the end of the precut headpin in the flame near the cone until it becomes red hot and balls. Drop it in the quench and then in the pickle. (If you don’t know what these are, just skip this section. These are commonly used with the torch work.) Art Jewelry has a nice video of the process. http://www.youtube.com/watch?v=ZxIGHCAXf6s&feature=related The video demonstrates balling silver and shows to use flux. I do not flux my copper wire before balling it.
If I give the headpins a patina bath, I put them in the tumbler for about 15 minutes to get them good and clean. They come out a bit crooked, but are easily straightened. This is a matter of choice and not completely necessary.
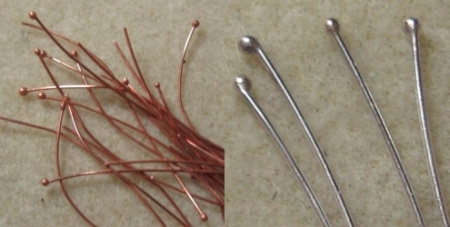
You can see in the photos that the balls on these headpins are not perfectly uniform. This happens due to the variability in the length of time the wire remains in the flame. I don’t cry over misshapen headpins, but simply toss them in the scrap container if I think they will look bad on the piece of jewelry.
Finally!
Needless to say, there are probably many more types of headpins that you can create. I think you will enjoy making these once you get going. Just think . . . no more rush trips to the store to purchase headpins at the last minute. AND you can tell people that you are an artist and make your own findings. How about that for a sales pitch?
Karen Meador
**Contributing authors are noted in the articles they wrote. All articles are copyright. You can reprint these articles as long as the original author is sited and a link to this website is included. The name Magpie Gemstones must be used as the hypertext.

NEWS!
New beads all the time & great sales!

RESOURCES
Over 100 FREE jewelry making, selling and gemstone tutorials - check it out now!