


Riviting - Cold Connections
Wave Bracelet
Karen Meador, PhD
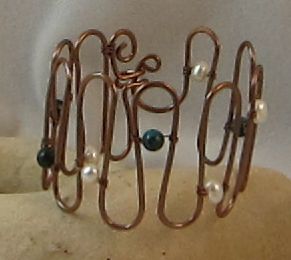 There are many variations to this bracelet and it can easily be modified to make it your own. The tutorial below shows the bracelet in its simplest form.
Materials
14 Gauge Wire (shown in copper) – Minimum 42 Inches for a 7” wrist
24 Gauge Wire (for binding embellishments) – Approximately 36 Inches
Beads for Embellishment (number varies according to your design)
Patina (if desired, Liver of Sulphur patina shown)
Tools
Flush cutters
Round Nose Pliers
Chainnose Pliers
Bail Making Pliers or Other Cylindrical Object (based upon size wave being made)
Hammer and Bench Block/Anvil
Optional: Tumbler
Procedures
1. Measure and cut at least 42 inches of the 14 gauge wire. The length will vary based upon the height of the wave, the width of the wave and the circumference of the bracelet. (Are you making this bracelet for Skinny Minnie or Hearty Helga?).
2. Begin the first wave in the center of the length of wire cut in step 1. Use the bail making pliers, a pencil, a dowel or whatever object provides the width wave you want.
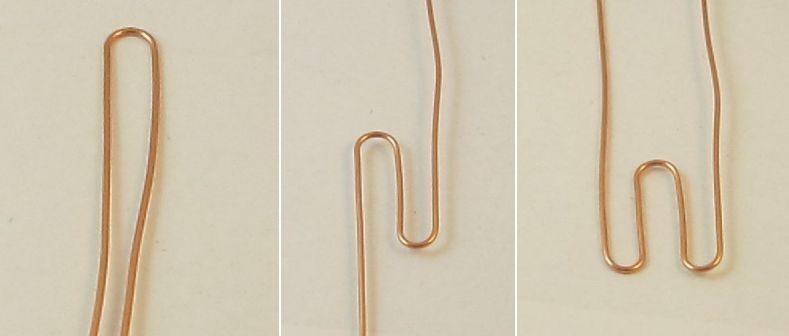
3. Determine the desired height of the wave and create a wave in the opposite direction on one side of the first wave. This produces the height of the bracelet; make this decision wisely.
4. Move to the other side of the first wave and create another wave in the opposite direction just like the one in step 3.
5. Continue in this manner moving from one side to the other until you have enough waves to create the circumference of the bracelet that you want.
6. Make the swirl end of the clasp. Measure 2 ¾ inches from the top of the last wave and flush cut the wire.
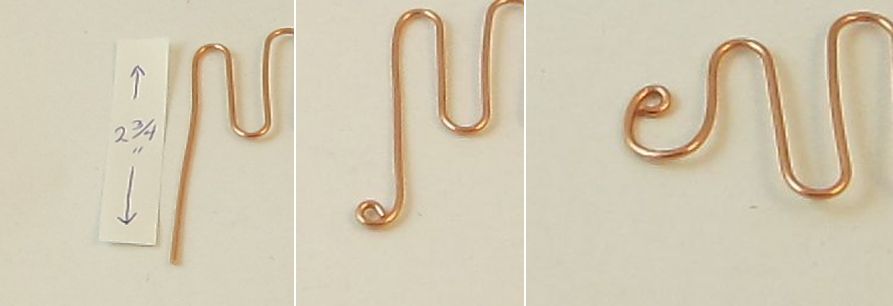
7. Use the round nose pliers to create a tiny loop in the end of this wire.
8. Gently form the rest of the swirl using a cylindrical object, such as the bail makers, to form the shape. This becomes a pirate’s hook NOT a closed swirl.
9. Make the hook end of the clasp. Measure 5 inches from the top of the last wave and flush cut the wire.
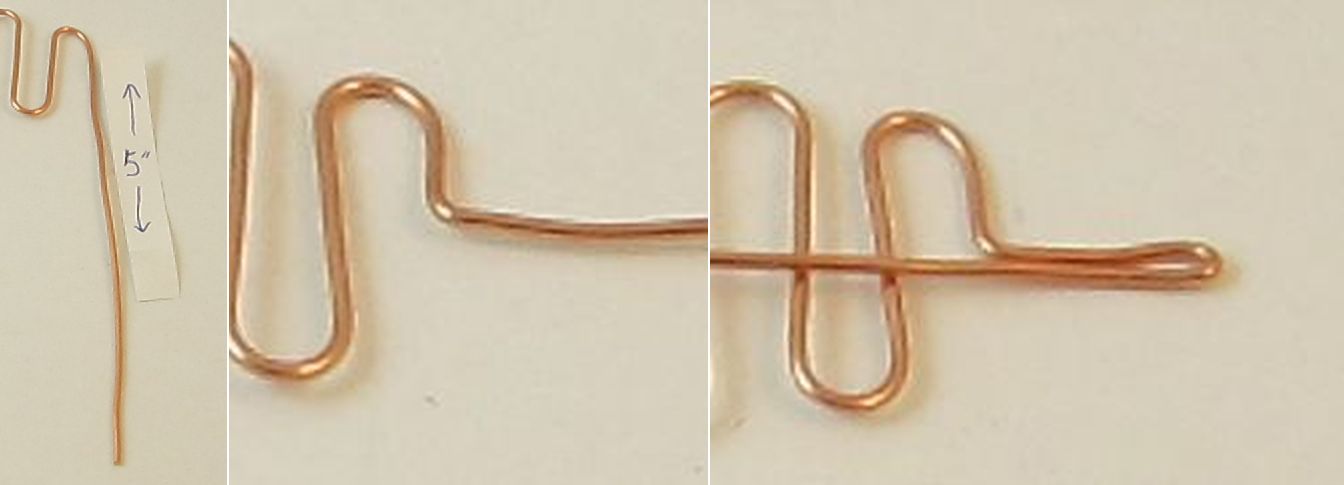
10. Measure ½ the height of the wave ( NOT ½ inch !) and use the chainnose pliers to turn the wire at a right angle to the wave.
11. Measure ¾ inch from this angle and turn the wire back towards the bracelet.
12. Measure ¾ inch from the turn back point and use the chainnose pliers to turn the wire at a right angle away from the hook.
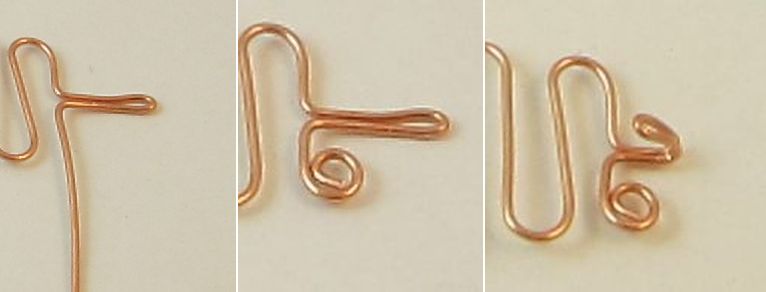
13. Shorten the remaining wire, if any, leaving about 1 ¼ inches.
14. Use the round nose pliers to swirl the remaining wire around until it almost reaches the hook.
15. Create a hook by turning the doubled wire back towards the bracelet.
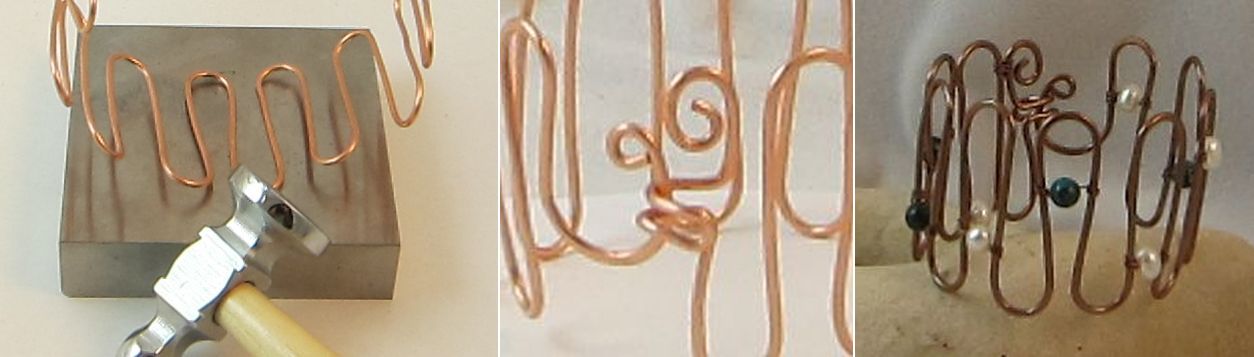
16. Hammer the bracelet from the inside which will cause it to begin forming a circle.
17. Close the bracelet with the clasp making adjustments as needed. Manipulate the pirates hook placing it under and around the other hook end. This is a much easier way that attempting the opposite.
18. Optional: Patina the bracelet now if desired. I usually dip my bracelet and the 24 gauge binding wire in Liver of Sulphur. Then I tumbled them for a couple of hours. If you patina the binding wire at this point it will be the same color as the bracelet wire.
19. Embellished the bracelet with your choice of beads. Plan the placement of these considering the number of waves you have and whether you want beads on every other wave or something else. At a minimum, I try to leave enough waves without embellishment to allow for adjustment of the bracelet size. If you wire across every wave, there is no play in the size of the bracelet.
20. To attach the beads, follow the directions provided in the wrapping and binding tutorial ……….. You will start the binding on one side of a wave, wrapping around at least three times. Then thread a bead or beads onto the wire, taking up the space across the wave, and complete the binding on the other side of the wave. Again, go around at least three times. You will want to make sure the ends of the binding wire sit on the inside of the wave so that they don’t rub the wrist or show on the top. (This is easier said than done.) Also, it is nice to make the same number of binds around the wire for each embellishment.
21. You will want to bind the wave and the swirl next to each clasp side to keep the clasp in the proper position.

22. Have fun!
Karen Meador<
Cold Connections with Riveting

You don’t need to be strong like Rosie the Riveter to use rivets in your jewelry. Aren’t you glad? You also don’t need a gun – I’m talking about a rivet gun, of course. Whenever I first mentioned riveting at the dinner table, the guys thought they knew just what I was talking about. They knew how to rivet! They had no idea what I really wanted to do.
As you likely already know, riveting is a means for connecting two or more pieces together without using heat. It’s a great technique to have in your bag of tricks, especially if you do not solder, although many torch pros use riveting for decoration or apply rivets when heat is not appropriate. Once you have spent a bit of time working with rivets, you will begin to recognize them in many more designs.
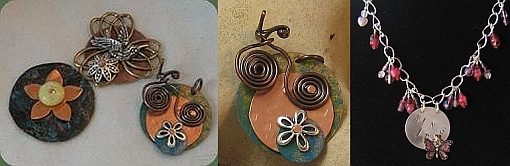
Starting from the left, the photo of samples shows a wire rivet connecting a bead through a flower on to a copper disc that was given a blue patina. This is a good example of a design for which heat would not work. Obviously, you wouldn’t want to heat a bead and you would ruin the patina on the disc by using heat. The top middle example is a simple purchased finding riveted through another finding and on to a disc. The example on the right shows the same idea and also illustrates that you can rivet wire to metal. You can view this more easily in the enlarged photo. Another photo shows that I riveted a purchased charm to a disc on the butterfly necklace. It was more appropriate to rivet through the charm loop here than to make a hole in the butterfly.
It is very important to use a gauge of wire that fits tightly into the hole to form the rivet. When the wire isn’t tight enough the rivet tends to lean in the hole. Cold connection instructors may provide students with conversion charts showing the size drill bit that fits specific wire gauges. At first I was excited about these, until I discovered I couldn’t locate the tiny drill bits locally. Finally, I purchased the smallest bit I could obtain and then matched the wire gauge to that bit. I use a 1/16” drill bit and 14 gauge wire.
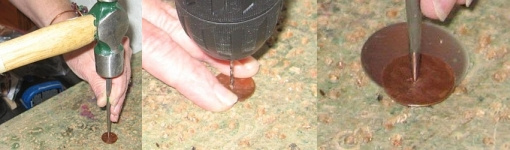
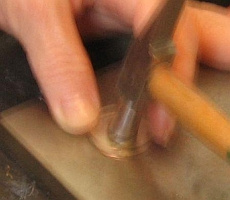
The photos below show the process of preparing to rivet and riveting. I regret that even after two tries, we were not able to get clearer photos. My engineer husband who has many talents says he was not meant to be a photographer.
If you are familiar with drilling holes in metal, please skip this part. I make a dent in the metal with a punch or nail so the drill won’t slip and drill a hole in the top piece. If you try this, please hold the piece down firmly with two fingers. The metal will spin once the hole is drilled. You don’t want to know how many times I’ve tried to hurry this process along and finished with bleeding fingers. Next, I set this piece on top of the bottom piece and create a dent in the bottom piece. Then I drill a hole in the bottom piece (not pictured).
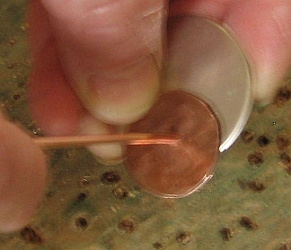
I wiggle the end of the wire into the holes in both pieces until about 1/8” shows on the back of the hole. You can see that I’m working with a long piece of wire. This is much simpler than precutting your wire and then trying to keep up with a tiny piece. I wonder how many of those are lost in my carpet.
I think this next part wherein the pliers become a vice is the Meador Method of Riveting. Please let me know if you have been taught to do this previously. I started doing it out of desperation. I tightly grasp the wire on top with flat nose pliers. I want the pliers to sit directly on the top piece being riveted.
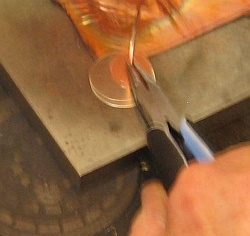
Then I flush cut the wire slightly above the pliers leaving about 1/16” above them. The picture shows how I often use another piece of metal under the entire piece while I work on the top. There is about 1/8” of wire on the bottom of the piece and this helps keep it from coming out of the hole.
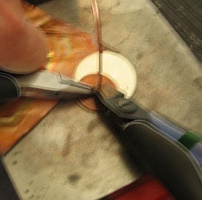
I continue to hold the wire tightly with the pliers as though they were a vice and use the riveting hammer to form the head of the rivet. While tapping the wire, I slowly turn the hammer or the piece in order to get a symmetrical head. The pliers will probably be marred; if you use this method, you will want to use an inexpensive or designated pair of pliers. I should NOT be using my Lindstroms for this!

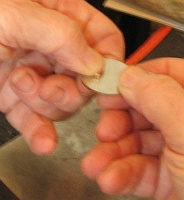
Next, I carefully release the pliers and push the newly formed head of the rivet farther into the hole until the head sits flush on the top piece.
Now I flip the piece over and work on the back and cut the wire showing to about a 1/16”.
Then I tap the wire with the rivet hammer and rotate it as I did on the front to form the back rivet head. Once the rivet is secure on both sides, I continue to work with it until I’m satisfied that it is well formed and tight. I also use the round head of the rivet hammer to smooth out the rivets. (Yes, the pictures are getting worse.)
Phew! That seems like a large number of steps, but it actually goes quite quickly if the wire fits tight enough.
By the way, if you happen to cut the wire too short or too long, just get another piece of wire and start over. I’ve learned that it is usually futile to try and fix a bad rivet. Starting over is much less frustrating.
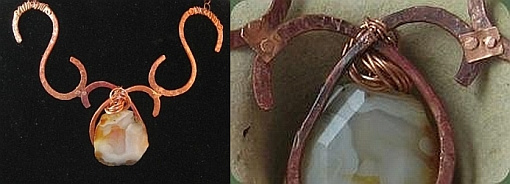
Rivets were used a bit differently in the necklace shown. The enlargement displays how I used a small piece of metal behind the pieces of the wire armature to make the connection. These connections allow just a bit of movement.
There are other types of rivets that you can use including things with heads purchased at the hardware store. You may also be able to find decorative rivets and tube type rivets for cold connections. I also like to create a balled end on a piece of wire with the torch and use the ball as the top rivet head as illustrated in the blue beads.
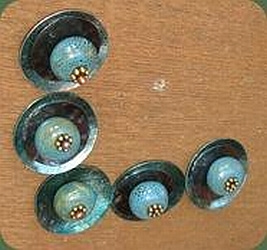
The trick on this one is to try to keep from flattening the ball when you hammer the back of the rivet. In the picture on the right, you can see how some of these rivets retained a rounded head while others did not. I connected these riveted discs with jump rings and completed a necklace with handmade wire. Unfortunately, this one found a new home before I took its picture.
Creating a cold connection with a rivet may be a simple task for some of you, but I found it to be difficult initially. I hope this article is positive and helpful to would-be riveters, but I feel I should mention the early pitfalls into which I fell. (ker-plunk) First, in trying to make plain wire rivets, I didn’t have wire that fit tightly enough into the holes. Secondly, I was using a regular hammer which made the process more difficult. If you really want to rivet, I suggest avoiding those problems. I spent many hours trying to rivet with wire that wasn’t tight enough for the hole size. It was a big waste of time! (although I may have gotten to practice uttering some new words) Let’s hope this short treatise saves you some of that! Happy riveting!
Karen Meador
**Contributing authors are noted and linked to in the articles they wrote. All articles are copyright. You can reprint these articles as long as the original author is sited and a link to their site and this website is included. The name Magpie Gemstones must be used as the hypertext.

NEWS!
New beads all the time & great sales!

RESOURCES
Over 100 FREE jewelry making, selling and gemstone tutorials - check it out now!